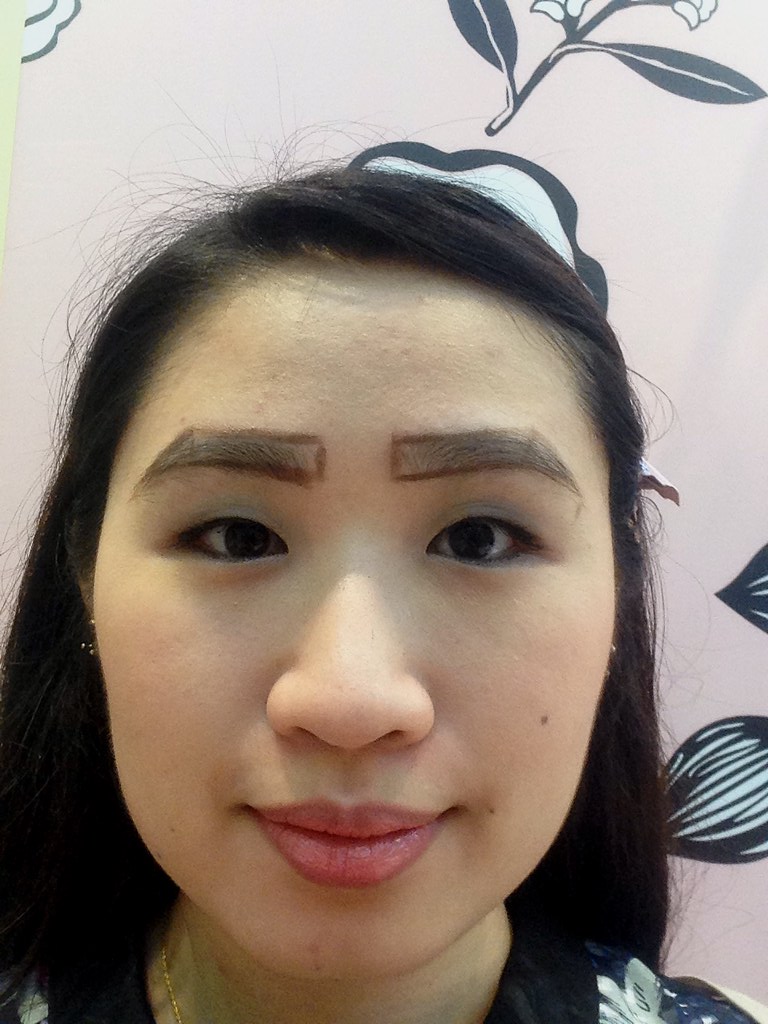
I used to think that since I have full brows, I didn't have to do anything with them anymore. I would try shading in some of the bald patches from years of errant tweezing, but kept getting than angry cavewoman effect because of the added definition.
 |
| See the bald patches from the thin early-2000s style? Thanks, high school me! |
A month ago, I decided to start over; grow everything back in to have them professionally shaped. Step 1 of having a forehead that can literally stun from 5 feet away. The kilay gods decided to shower some blessings on my instagram account and I got invited to Benefit's Beauty and Brows Bash for The Beauty Junkee. The other 5 winners and I got treated to a free Benefit Brow Wax, sugary treats, and a few Benefit goodies. Ms. Martha, the Beauty Junkee, gave a demo of her signature 3-minute Billion Dollar Brows.
Details after the jump!
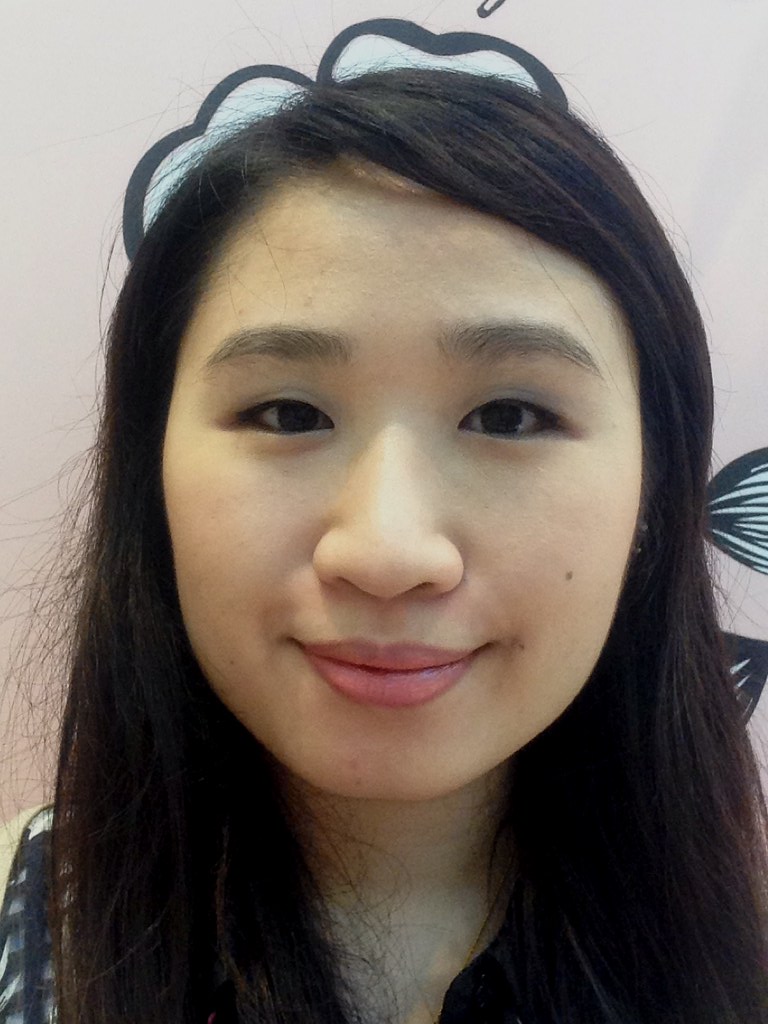
Of course, my camera charger decided that this was the perfect day to die on me, so here's a front-camera phone "before" the brow wax and grooming selfie.
First, the brow expert asked if I had been using any whitening products on my face. There's a no-go list of products on the waiver you sign before the wax. Some of these products, you have to stop using a few weeks before (creams, whitening products, strong acne meds), to a few months before. I couldn't find the complete list online, so here are some of them.
The no-wax list*: laser peel, retinoids (or any topical Vitamin A), prescription-strength benzoyl peroxide, or any whitening products. Accutane, you have to stop 6 months prior to your waxing.
*This is by no means complete,so you should take note of any other products or skin damage (e.g. cuts, peeling, sunburns) that can lead to sensitivity issues. You wouldn't want the wax to take some of your skin off!
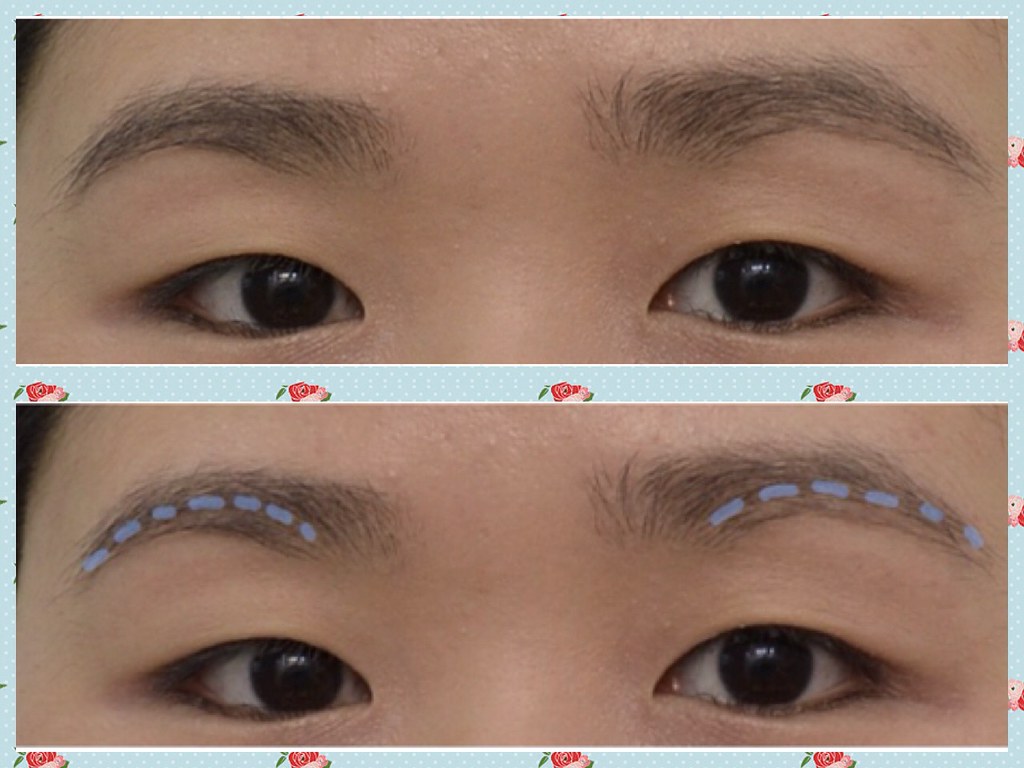
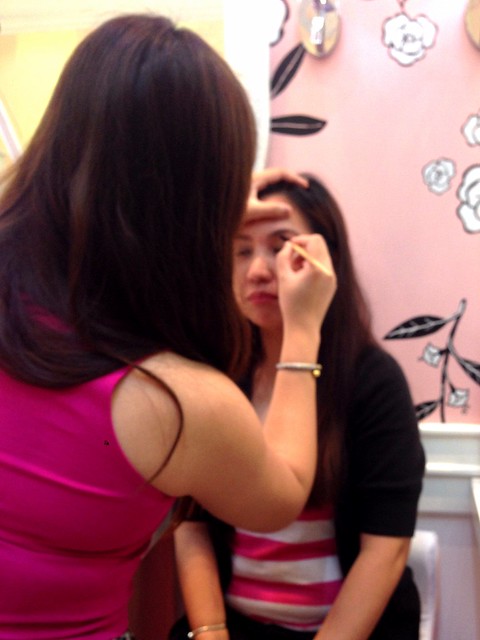
Before the actual waxing, the brow artist mapped my brows first with some deft measuring and some brow powder.
Details after the jump!
Of course, my camera charger decided that this was the perfect day to die on me, so here's a front-camera phone "before" the brow wax and grooming selfie.
First, the brow expert asked if I had been using any whitening products on my face. There's a no-go list of products on the waiver you sign before the wax. Some of these products, you have to stop using a few weeks before (creams, whitening products, strong acne meds), to a few months before. I couldn't find the complete list online, so here are some of them.
The no-wax list*: laser peel, retinoids (or any topical Vitamin A), prescription-strength benzoyl peroxide, or any whitening products. Accutane, you have to stop 6 months prior to your waxing.
*This is by no means complete,so you should take note of any other products or skin damage (e.g. cuts, peeling, sunburns) that can lead to sensitivity issues. You wouldn't want the wax to take some of your skin off!
Before the actual waxing, the brow artist mapped my brows first with some deft measuring and some brow powder.
 |
| from Benefitcosmetics.com |
 |
| *poof!* |
This is essentially a "map" of where stray hairs have to be taken out, and where the lighter spots have to be filled in. Plus, it's a little preview of what it's going to look like afterwards.
Now, for the waxing. Even though this was my first ever brow wax aside from the DIY kits (that only ever worked for my upper lip), I wasn't the least bit apprehensive, since I've been tweezing stray hairs - not to mention a good chunk of actual eyebrow - for the better part of 8 years. I don't even feel the hairs getting yanked out anymore unless they're sitting on my eyelids. The brow expert tested the wax's temperature on my inner wrist first, then it was a slim popsicle stick smearing warm wax above my eye, a small cloth strip being patted down, and--
Now, for the waxing. Even though this was my first ever brow wax aside from the DIY kits (that only ever worked for my upper lip), I wasn't the least bit apprehensive, since I've been tweezing stray hairs - not to mention a good chunk of actual eyebrow - for the better part of 8 years. I don't even feel the hairs getting yanked out anymore unless they're sitting on my eyelids. The brow expert tested the wax's temperature on my inner wrist first, then it was a slim popsicle stick smearing warm wax above my eye, a small cloth strip being patted down, and--
YANK.
I gave a high-pitched sqawk.
"Mababa yung pain tolerance mo no?"
Not true. I have a high threshold for pain; getting migraines does that to you. My dentist gave me a 7/10 score after he poked my inner arm with an explorer. But I guess the wax pulling on the skin added a new dimension of discomfort. The succeeding strips after that were much better though, since I knew what to expect.
 |
| the pearlescent cauldron of good and evil |
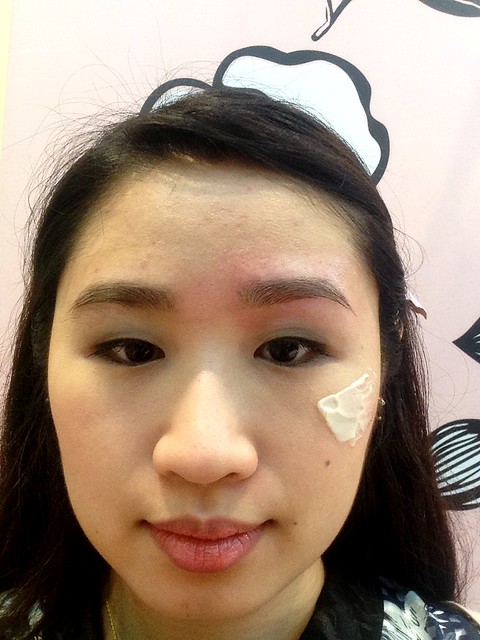 |
| clutching a half-eaten macaron for comfort, with It's Potent! eye cream smeared on my cheek |
It took a total of 10 strips for me: 1 between the brows, 4 for the left side, and 5 for the right. She then finished up with some light tweezing to get the little hairs (this I did not feel at all), and a light oil to remove the residual wax. She wanted me to get an upper lip wax, too, but I figured that I had suffered enough in the name beauty that day. Besides, I wouldn't be able to eat the donuts they prepared for the event, in the fear that they might turn into a couple of sprinkled chocolate zits from hell. There were a few donuts left, and I felt that I deserved a reward for squealing for only the first 4 strips or so.
 For the bald patches, she recommended castor oil at bedtime to help them grow back in; but maybe argan oil for me, since castor oil breaks me out. (Castor oil worked quite well on my eyelashes though)
She then applied a cold water compress to close the pores and to soothe some of the redness. We were advised not to wet/wash the waxed area for 5-8 hours afterwards. I guess the cold water of the compress somehow doesn't count?
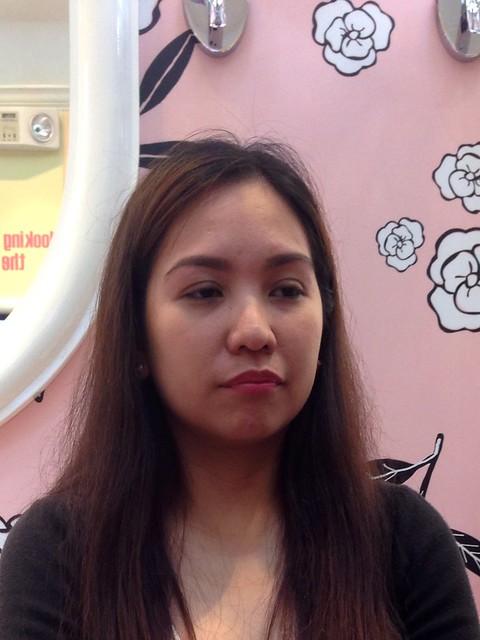
The final step was some brow grooming to complete my brand new BeneBrows (Is that even a thing? I'm making it a thing.). The brow expert mapped my brows much more subtly this time, filled them in with Browzings powder, and highlighted the arches with High Brow Glow pencil.
For those who have sensitive skin: You might want to take a rain check on the grooming part. Makeup into traumatized pores is usually a bad idea. I waited for a full 12 hours before washing my face (ew, I know) then woke up to a few zit-like bumps. They were gone the next day though, so that was a relief.
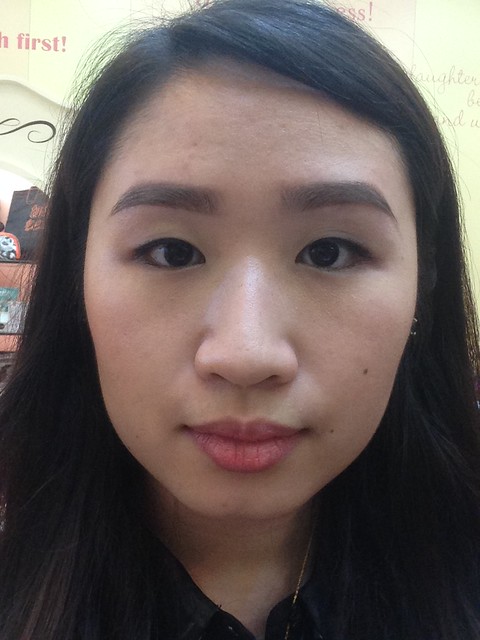 |
| Ta-da~! WORTH. IT. |
Ms. Martha then demonstrated her signature 3-Minute Billion Dollar Brows on a fellow guest/contest winner, Ms. Rita.
The online tutorial is here: Brows 101: Grooming, Shaping, and Rules to Live By but for the full Billion Dollar demo, you're going to have to cross your fingers and hope you get lucky on the next Brow Party Instagram contest, because that has to be seen live!
But as for the Benefit method, my Brow Expert (I forgot her name, sorry :( ) was kind enough to teach me how to re-create my new look:
The online tutorial is here: Brows 101: Grooming, Shaping, and Rules to Live By but for the full Billion Dollar demo, you're going to have to cross your fingers and hope you get lucky on the next Brow Party Instagram contest, because that has to be seen live!
 |
| With the lovely assistant/contest winner Ms. Rita |
Step 1: Get your brows shaped professionally (this is advice from a Benefit Brow Expert, after all)
You don't have to be born with perfect brows; you can get a brow expert to create them! Your brow expert will get rid of all the extra hairs obscuring your perfect brows and show you other spots you may have to fill in. Yes, this means having to grow everything out first, so slap on your biggest hipster glasses and pretend to be mysterious for a month or so. This will make your eventual transformation even more dramatic.
Step 2: Ready your artist tools
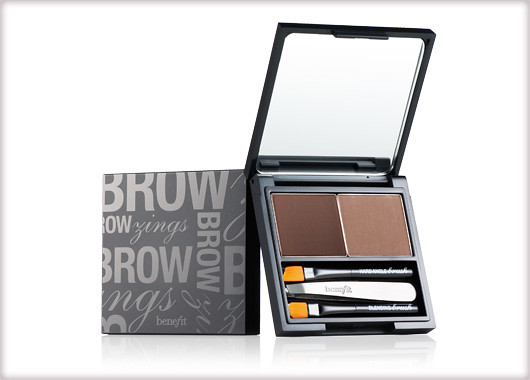
Basic Kit: brow powder, brow brush, spoolie, tweezers
The Browzings powder she used to groom my brows is almost the complete set, minus the spoolie.
Level Up: browcara, highlighter
A lot of the difficulties beginners face have to do with the quality of tools they're using. Of course when you start trying something out, you tend to go for the more affordable tools, but then if these fail to perform, you might not be pleased with the results!
The Browzings powder she used to groom my brows is almost the complete set, minus the spoolie.
 |
| from benefitcosmetics.com |
Level Up: browcara, highlighter
A lot of the difficulties beginners face have to do with the quality of tools they're using. Of course when you start trying something out, you tend to go for the more affordable tools, but then if these fail to perform, you might not be pleased with the results!
Special mentions in this category are brow powders that don't match your hair color, bad brushes, and draggy pencils with bad pigmentation. Haven't we all had that experience with a bad pencil that begged the question, "hello, is this thing on?"
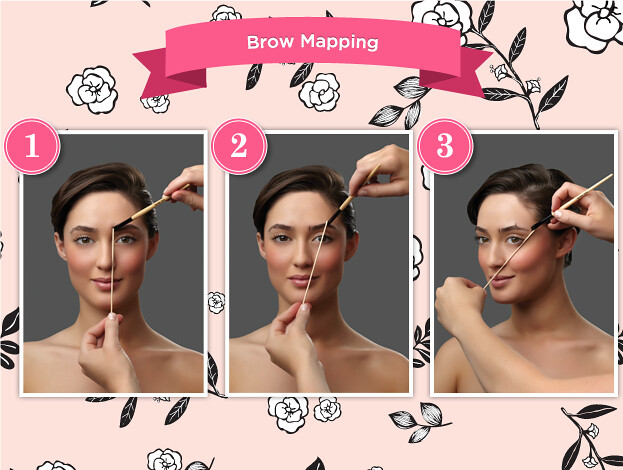
Step 3: Map your brows.
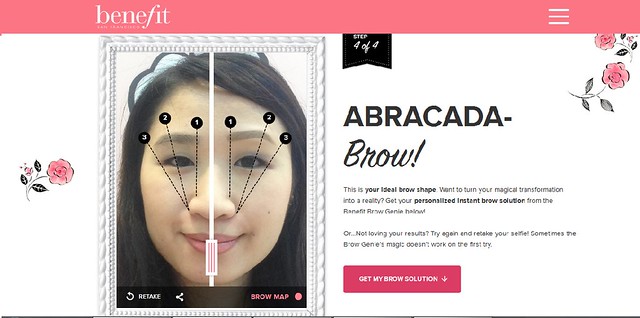
Now that you have your beautiful brows and tools, it's time to use them. The first step is to map your brows to figure out where you should fill them in. The brow mapping diagram above from Benefit shows you how to measure with the help of three essential points:
Now that you have your beautiful brows and tools, it's time to use them. The first step is to map your brows to figure out where you should fill them in. The brow mapping diagram above from Benefit shows you how to measure with the help of three essential points:
1. The bridge of your nose for the inner brow
2. A diagonal line starting from the side of your nose, up to where your arch should be
3. An almost-45 degree line starting from the side of your nose to the outer corner of your eyes for the brow end/tail.
Still don't get it? Well, they have an app for that! Try the Benefit Brow Genie upload a selfie, and it'll show you what you could look like with BeneBrows.
Step 4: Fill in and comb through
Now that that's done, just fill in the mapped area. Easy as that!
Step 5 (optional): Seal them! or set in place with browcara
For those with oily skin, you can opt to set your brows with some translucent powder first.
Additionally, you can set your brows in place with some clear browcara, or for those with sparse brows, pigmented browcara with fibers -- like the kind in lengthening mascara.
Additionally, you can set your brows in place with some clear browcara, or for those with sparse brows, pigmented browcara with fibers -- like the kind in lengthening mascara.
And that's it! Billion Dollah Brows, baby.
 |
| Ooh and ahhs all around |

I was a bit tongue-tied after the shock from the wax and forgot to ask questions -- not that there were many left after her very informative demonstration -- but this was a great experience overall. I noticed that a lot of Benefit's regular customers kept coming in for their own waxing sessions throughout our mini event.
Many thanks to our fairy browmothers, Ms. Martha and Ms. Tasha - they say that Ms. Tasha is in charge of all the delightful posts on Benefit Philippines' Instagram page - who shared a lot of tips and even some landi advice for all 6 brow waxing virgins in attendance. We even got to go home with a goodie bag.
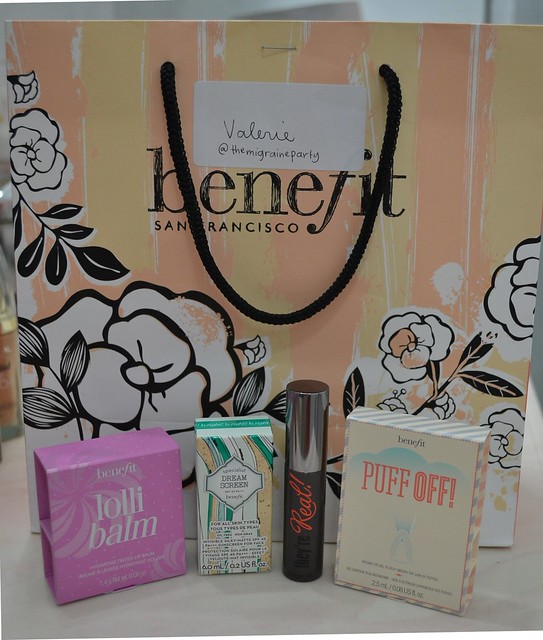 |
| Huzzah! |
So, have you already taken the plunge? Or are you not yet ready to commit? Feel free to share your brow stories below! We'd also love to see your Benefit Browgenie looks
You can find Benefit branches at the following locations:
1/F Greenbelt 5 (729-9854)
Rustans Makati,
Rustans Shangrila,
Mall of Asia,
TriNoma,
Alabang Town Center
BGC Central Square
Hi Valerie,
ReplyDeleteGreat post! Love it. :) Glad that you were able to pick up something from my 'hazy' Billion Dollar Brow Tutorial. As I said, it was my first workshop in two years haha! :D Hope to see you soon!
Thanks for having us! Can't wait for the other workshops :D it was nice hearing your actual voice after months of reading your blog. See you soon!
DeletePraying that there's a repeat. BTW, there's been a price increase on brow waxes since March pa pala. From PHP 500, naging PHP 600 na. :( Buuuut we gotta do the birthday brows treat thing. Let's go together!
ReplyDeleteI think she mentioned that she wanted to make this a regular thing :D fingers crossed for you because you just HAVE to see the Billion Dollar Bros tutorial in person!
DeleteBirthday brows?? That's a thing? Let's go!